


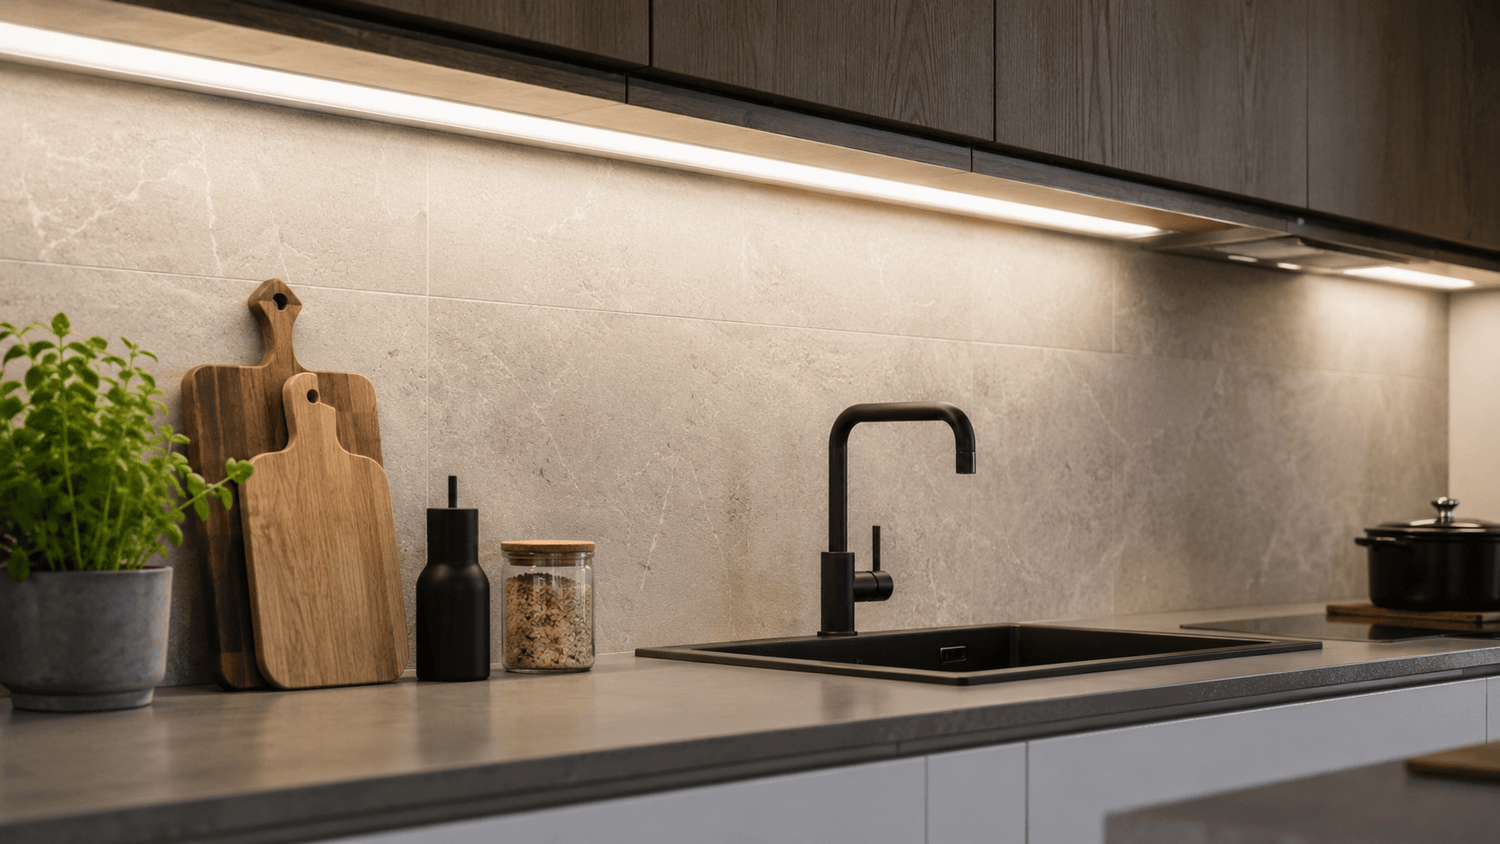
In brief: The best choice for kitchen under-cabinet and backsplash lighting is a dotless COB LED strip (24 V, approximately 9–14 W/m, CRI 90+, 3000–4000 K) installed in an aluminium profile with opal diffuser. Mount the profile on the cabinet underside near the front edge so light falls on the worktop without glare. Size the driver approximately 20% larger than the strip's total consumption. Light Factory offers kitchen LED strip lights, profiles and drivers in one place, plus a ready-made kitchen backsplash LED lighting kit for simple installation.
Why under-cabinet LED strip lighting transforms your kitchen
Kitchen under-cabinet LED strip lighting has a surprisingly significant impact on how your kitchen feels in daily use. Good worktop lighting makes food preparation easier, reduces shadows on the working surface and completes the overall appearance of the kitchen. Poorly chosen or incorrectly installed LED strips, however, can cause glare, appear spotty or remain too dim precisely when you need the light most.
In the kitchen, lighting isn't just about atmosphere. You chop, measure, read recipes and perform precision tasks on the worktop. If light only comes from the ceiling fixture, wall cabinets and your own body can cast shadows directly onto the worktop. This is why an LED strip installed under the cabinets is often the most practical solution for kitchen backsplash and worktop lighting.
Good kitchen task lighting illuminates the worktop evenly along its entire length. The light should fall on the working area, not directly into your eyes. This is where the profile, diffuser and installation location become crucial. When done correctly, the LED strip remains unobtrusive, but the lighting feels noticeably better in daily use.
Choosing the right LED strip for kitchen worktops
Kitchen LED strips are chosen primarily according to their intended use. For under-cabinet worktop lighting—the main task lighting—you need sufficient power. For ambient lighting above cabinets or in display units, more modest power will suffice.
As a practical guideline for kitchen worktops, choose an LED strip that provides even and sufficiently bright light. A power rating of approximately 9–14 W/m works well as a starting point in many homes. The final choice depends on how long the area to be lit is, how light the worktop and backsplash are, and whether you want working light or softer general lighting support.
COB LED strips vs traditional strips
COB LED strips are the popular kitchen choice because they produce a more uniform light line than traditional dotted LED strips. This is particularly useful when the LED strip remains in a visible location or the profile is shallow. Traditional LED strips still work in many applications, but light dots can be more visible if the diffuser and profile don't soften the light sufficiently.
COB technology places LEDs much more densely on the strip, creating a continuous ribbon of light rather than individual dots. This is ideal for glossy worktops or reflective backsplash tiles where individual LED reflections would be distracting. Learn more in our guide What is a COB LED strip?
| Feature | COB LED strip | Traditional LED strip |
|---|---|---|
| Light line | Even and uniform | LED dots may be visible |
| Kitchen use | Worktops, visible light lines, profile installations | Indirect lighting, where strip isn't directly visible |
| Profile installation | Suits shallower profiles well | Benefits from deeper profile and opal cover |
| Reflections on glossy surfaces | Minimal | Can be visible |
12 V or 24 V: which voltage for your kitchen?
In kitchen lighting, a 24 V LED strip is the practical choice in many applications because it suits longer light runs and helps manage voltage drop. A 12 V LED strip can work in short installations under 2 metres, but for longer runs—typical in kitchen worktop installations—a 24 V solution is often easier to specify and more reliable.
Colour temperature: 3000K or 4000K?
Colour temperature significantly affects how the kitchen looks and feels. Warm white 3000K suits many homely kitchens and wood finishes, creating a cosy atmosphere. A more neutral 4000K works well in modern kitchens where you want fresh and clear task lighting that shows food colours accurately.
3000K is warmer and more homely, 4000K is more neutral and fresher for working. If the kitchen has many white and modern surfaces, 4000K can work well. In wood finishes and warm interiors, 3000K is often pleasant. If your kitchen opens into a living area, coordinate the LED strip colour temperature with your living room lighting.
CRI colour rendering matters in kitchens
Colour rendering, or CRI, is particularly worth noting in kitchens. Good colour rendering helps food, materials and surfaces appear more natural. For kitchens, choose at least a CRI 90 LED strip whenever you want a quality and pleasant result. This ensures vegetables, meat and prepared dishes look appetising and natural under the light.
IP rating for kitchen environments
IP rating is chosen according to the installation location. In a normal dry backsplash, IP20 may suffice if the LED strip is protected from splashes and installed in a profile. If the installation is near the sink or where moisture or splashes occur, choose a moisture-protected option, such as an IP65 LED strip. IP65 strips have silicone coating that protects against water splashes whilst maintaining good light output.
Aluminium profiles and diffusers for clean installation
An LED profile is one of the most important components in kitchen under-cabinet lighting. The profile protects the LED strip, facilitates clean installation and helps finish the appearance. Additionally, the aluminium profile acts as a heat sink, which is important for the LED strip's longevity.
LED strips should never be installed directly onto the underside of kitchen cabinets without a profile if the goal is a durable and finished result. An aluminium profile protects the LED strip, assists with heat management, keeps the strip straight and enables diffuser use.
The diffuser, or profile cover, affects whether the LED dots are visible or whether the light forms a more uniform light line. The deeper the profile and the better quality the diffuser, the more even the result usually is. A shallow profile suits tight spaces, but if you want light that's as dotless as possible, choose a sufficiently deep profile and suitable opal cover.
Profile types for kitchen under-cabinet lighting
Common profile options for kitchen under-cabinet installations include:
- Surface-mounted profile: Easy to install on the underside of a cabinet, most common choice
- Corner profile: Directs light at an angle towards the worktop, reducing glare and improving light distribution
- Recessed profile: The most finished solution but usually requires more planning and fabrication during cabinet construction
For best results, install the profile near the front edge of the wall cabinet—not at the back against the wall. This positioning ensures light falls on the worktop where you work, rather than creating a bright strip on the backsplash whilst leaving the front of the worktop in shadow.
Sizing your LED strip system: drivers and power calculation
LED strip sizing isn't difficult when you start with three pieces of information: LED strip length, power per metre and power reserve to leave for the driver. The LED driver (also called a transformer or power supply) shouldn't be right at its nominal power limits; it's good to leave approximately 20% margin for reliability and longevity.
Step-by-step power calculation
Example: if the backsplash lighting length is 3 metres and you choose a 12 W/m LED strip, the consumption is 3 × 12 W = 36 W. When you add approximately 20% power reserve, a suitable driver is at least around 45 W.
| Installation length | LED strip power | Calculated consumption | Recommended driver |
|---|---|---|---|
| 2 m | 9.6 W/m | 19.2 W | at least approx. 25 W |
| 3 m | 12 W/m | 36 W | at least approx. 45 W |
| 4 m | 14.4 W/m | 57.6 W | at least approx. 75 W |
| 5 m | 12 W/m | 60 W | at least approx. 75 W |
When choosing an LED driver for the kitchen, always check the LED strip voltage. A 24 V LED strip requires a 24 V driver and a 12 V LED strip requires a 12 V driver. Voltages must not be mixed. The driver should be located in a ventilated space—inside a cabinet with adequate airflow is typical—and never covered or buried where heat cannot dissipate.
Dimming and control options for kitchen LED strips
Dimming should be planned before installation. In the kitchen, the same light run can function as task lighting in the morning and softer background lighting in the evening. Many modern drivers are dimmable, but you must verify compatibility between the LED strip, driver and dimmer or controller.
Control options include:
- Simple on/off switch: Most basic option, suitable when dimming isn't needed
- Wall dimmer: Traditional rotary or slider dimmer, check LED compatibility
- Remote control: Wireless RF or infrared remote for convenient dimming
- Motion or presence sensors: Automatic activation when you approach the worktop
- Smart control: Integration with home automation systems for scheduling and scenes
For best convenience, many customers choose a combination: a manual switch for on/off and a remote or sensor for dimming. This provides flexibility whilst maintaining simple manual control.
Step-by-step installation guide for kitchen under-cabinet LED strips
Good installation begins with measurement and planning. Before ordering, measure cabinet undersides, corners, feed points and possible cutting locations. At the same time, decide whether the LED strip will be one long run or several separate sections.
Kitchen LED strip installation checklist
- Measure illuminated lengths accurately, noting any corners or breaks
- Choose LED strip power according to application (9–14 W/m for worktops)
- Choose colour temperature: 3000K for warm, 4000K for neutral working light
- Select appropriate aluminium profile and opal diffuser
- Calculate LED strip total power and choose driver with 20% margin
- Plan wiring route and driver location in advance
- Install profile on cabinet underside near front edge (not back against wall)
- Test LED strip before final fixing to profile
- Ensure fixed electrical installations are done by a qualified electrician
During installation, avoid excessively tight bends (most LED strips have minimum bend radius specifications), ensure the mounting surface is clean and dry, and don't undersize the driver. Cable length and voltage drop must also be considered when installing LED strips over long distances—another reason 24 V is often preferred over 12 V for kitchen installations.
Avoiding common installation mistakes
One of the most common mistakes is installing an LED strip without a profile. It may seem like an easy solution initially, but the result often looks unfinished. The strip may be visible, the light can be spotty, and the installation is more easily exposed to dirt or mechanical stress. In kitchens, a profile is almost always a recommended part of the package.
Other mistakes to avoid:
- Choosing an LED strip that's too dim—kitchen backsplash lighting needs to be genuinely functional
- Undersized driver that runs at full capacity and may fail prematurely
- Wrong colour temperature that doesn't match the rest of the kitchen
- Feeding long runs from only one end, causing voltage drop and dimmer far end
- Installing strip too far back on cabinet, creating bright backsplash but dark worktop
- No diffuser on profile, leaving individual LED dots visible
Ready-made kitchen backsplash lighting kit
If you want a simple, complete solution without calculating components separately, Light Factory offers a kitchen backsplash LED lighting kit. This ready-made package includes a quality COB LED strip, suitable aluminium profile with diffuser, correctly sized driver and all necessary connectors—everything you need for a professional under-cabinet installation.
The kit takes the guesswork out of component matching and ensures all parts work together optimally. It's particularly useful for DIY renovators who want professional results without becoming LED lighting experts.
Kitchen LED strip applications beyond under-cabinet lighting
Whilst under-cabinet worktop lighting is the most common application, LED strips serve many other purposes in kitchens:
| Kitchen application | Recommended LED strip type | Key consideration |
|---|---|---|
| Worktop lighting | COB or dense strip, 10–15 W/m | Sufficient power, good CRI and glare control |
| Above-cabinet ambient | Warm or neutral, 4–10 W/m | Creates glow on ceiling, softer than task lighting |
| Display cabinets | Low- to medium-power strip | Light direction and neat wiring |
| Plinth lighting | Low-power, warm temperature | Safe movement at night, ambient effect |
| Kitchen island | Similar to worktop lighting | May be visible from living area, choose accordingly |
Practical tips for long-lasting kitchen LED lighting
Once installed, LED strip lighting requires minimal maintenance, but a few considerations ensure longevity:
- Keep profiles clean: Wipe diffusers occasionally with a damp cloth to remove cooking grease and dust
- Ensure ventilation: Don't block driver ventilation openings in the cabinet
- Avoid overheating: Quality aluminium profiles help, but don't install LED strips near heat sources like ovens
- Use appropriate power: An oversized driver running at 60% capacity lasts longer than one at 100%
- Plan for replacement: Even long-life LEDs eventually dim; choose systems where the strip can be replaced without removing the entire profile
Quality LED strips in proper installations typically provide 30,000–50,000 hours of light—many years of daily kitchen use. LEMLUX series strips from Light Factory carry a 5-year warranty, reflecting their build quality and expected longevity.
Explore our full range of kitchen LED strip lights, kitchen LED profiles, LED drivers and ready-made solutions at Light Factory. All products are available for delivery across the EU within 3–8 days, and our customer service team at asiakaspalvelu@valotehdas.fi is happy to help with selection and technical questions.
Frequently asked questions
What LED strip suits kitchen under-cabinet and backsplash installation?
The best choice is a dotless 24 V COB LED strip (approximately 9–14 W/m, CRI 90+, 3000–4000 K) in an aluminium profile with opal diffuser. The profile is attached to the underside of the wall cabinet near the front edge, so light falls on the worktop without causing glare. COB strips avoid the spotty appearance of traditional LED strips and work particularly well on glossy worktop surfaces.
What colour temperature should I choose for kitchen LED strip lighting?
3000K or 4000K suits most kitchens. 3000K is warmer and more homely, ideal for wood finishes and cosy kitchens. 4000K is more neutral and fresher, providing clearer task lighting for food preparation. If the kitchen has many white and modern surfaces, 4000K works well. In warm interiors with wood, 3000K is often more pleasant. Consider how the kitchen connects to adjacent living spaces when choosing.
Does kitchen backsplash lighting need an IP rating?
In a dry location away from the sink, IP20 may suffice when the LED strip is inside a profile and protected from splashes. If the LED strip is near the sink, hob or where moisture or splashes occur regularly, choose a moisture-protected IP65 LED strip. The IP65 silicone coating protects against water whilst maintaining good light output.
How do I size the LED driver for my kitchen strip?
Multiply the LED strip length by watts per metre. For example, 3 m × 12 W/m = 36 W total consumption. Add approximately 20% power reserve, so the driver should ideally be at least around 45 W. Also verify that the driver voltage matches the LED strip (24 V strip needs 24 V driver). This power margin ensures the driver runs cool and lasts longer.
Can I install a long LED strip with one driver?
You can use one driver if its power is sufficient and the wiring is properly planned. In long runs over 5 metres, voltage drop should be considered—the far end may appear dimmer. A 24 V LED strip is often better suited to longer installations than 12 V. If necessary, the strip can be fed from both ends or divided into multiple feeds to maintain even brightness across the entire length.
How do I choose a profile for clean under-cabinet installation?
Choose the profile according to installation location and desired finish. A surface-mounted profile is easiest for cabinet undersides and most common. A corner profile directs light at an angle onto the worktop, reducing glare and improving coverage. A recessed profile gives the most finished result but requires planning during cabinet construction. For the most even, dotless light line, choose a sufficiently deep profile with a quality opal diffuser.
Can LED strips cause glare in the kitchen?
Yes, if the LED strip is visible directly to the eyes or installed too far forward without a diffuser. Glare can be reduced by installing the strip in a profile with opal diffuser, positioning the light so it's directed towards the worktop rather than into the viewing direction, and mounting the profile near the front edge of the cabinet (not at the back). Corner profiles that angle light downward are particularly effective at minimising glare.


0 comments