LED-light strip installation
The installation of the Led strip is usually very easy and LED-The connection of the strip can be done by anyone, with certain main limitations. And especially when you have the right accessories at your disposal. Read our installation tips below!
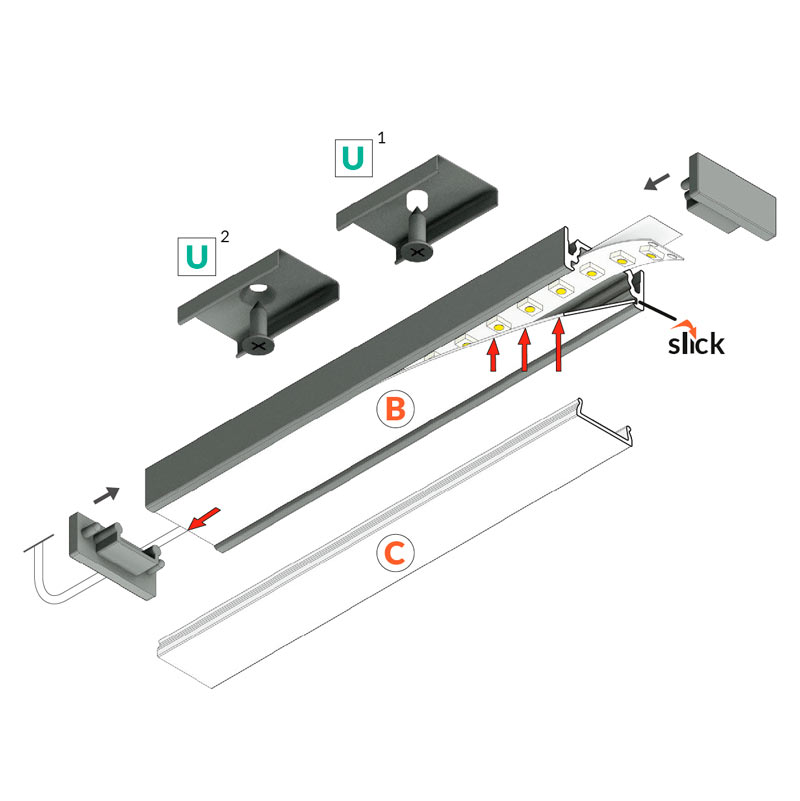
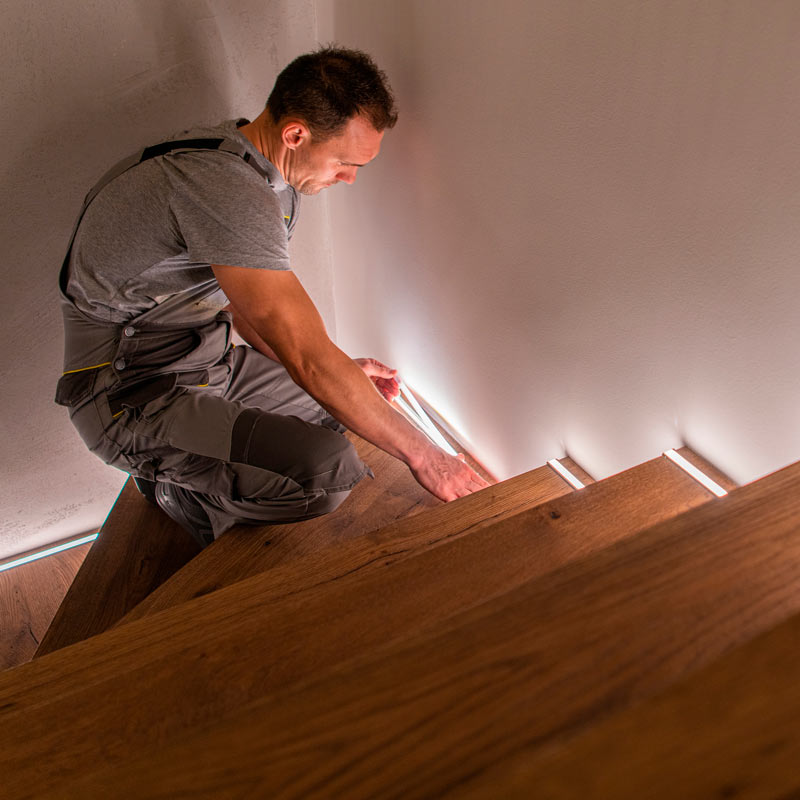
LED-Installation of the profile
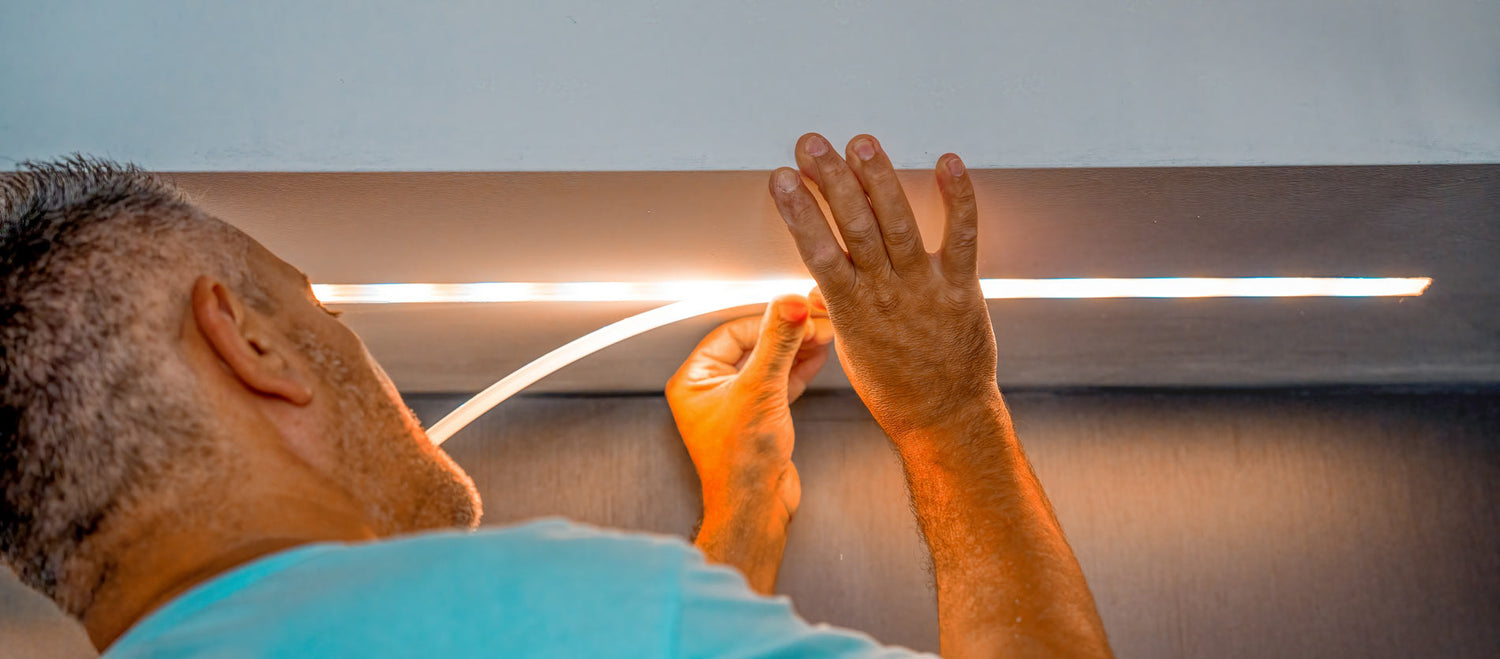
Measure and measure LED-the appropriate point on the profile. LED-The aluminium profile can be fixed in place in a number of ways depending on the model, for example using our range of compatible fixings or by screwing through the profile, gluing or taping.
The aluminium profile can be shortened with a hacksaw or a circular saw (recommended) to a suitable length. Click-on covers can be shortened with a saw and sliding diffusers can be shortened with scissors. Also take into account the length of the end pieces, they will increase the overall dimension by a few 0,5-1cm.
The profile can also be sized 5-10cm shorter than the lighting requirements for kitchen worktops, for example, as even a slightly shorter profile will distribute the light evenly to the edges and make installation easier as the profile will fit more easily into place.
Installing the LED profile in the profile
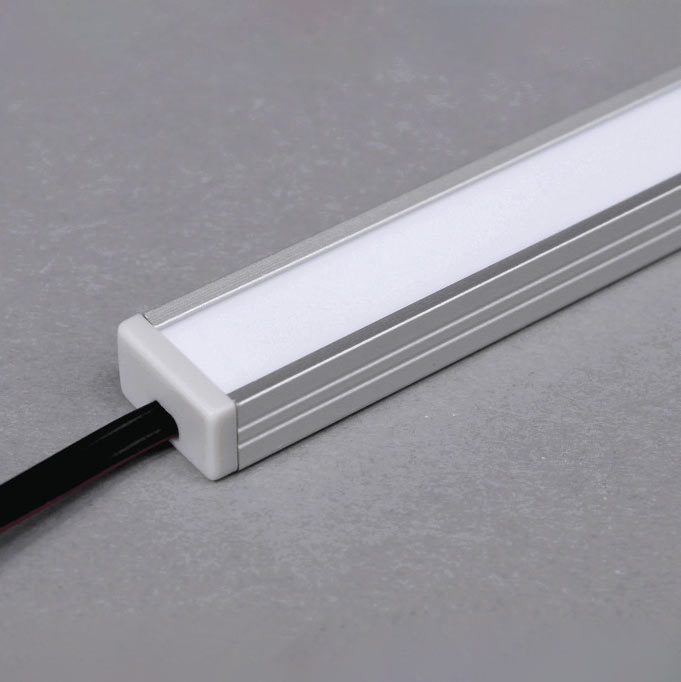
LED profiles are used to tidy up the installation and also protect the LED strip and equalize the strip's temperature, which extends the strip's lifespan.
Measure and mark a suitable spot for the LED aluminum profile . The LED aluminum profile can be attached in several ways depending on the model, for example using our ready-made compatible brackets or by screwing through the profile, gluing or using mounting tape.
The aluminum profile can be shortened with a hacksaw or circular saw (recommended) to the appropriate size. The click-on covers can be shortened with a saw and the sliding diffusers can be shortened with scissors. Also take into account the size of the end pieces, they add about 0.5-1cm to the total size.
The profile can also be sized 5-10cm shorter than the lighting needs, for example on kitchen countertops, as the light is distributed evenly from a slightly shorter profile all the way to the edges and installation is easier as the profile fits more easily into place.
LED-light strip installation
Installing a Led strip is usually very easy and LED-The wiring of the strip can be done by anyone, as long as you follow certain rules. You can connect LED-without any electrical training if you use a transformer that attaches to the socket. Almost all of our transformers have a plug with screw connectors, which you can use to connect the transformer to the socket.
All LED-all our ribbons have an adhesive backing on the back of the ribbon to hold the ribbon in place. strip can be fixed in different places. It is often a good idea to clean the surface to which you are attaching the tape to ensure that it stays in place. strip the surface on which it is attached. When installing the tape, it is a good idea to press it into place while removing the tape on the back.
LED-step-by-step application of the tape
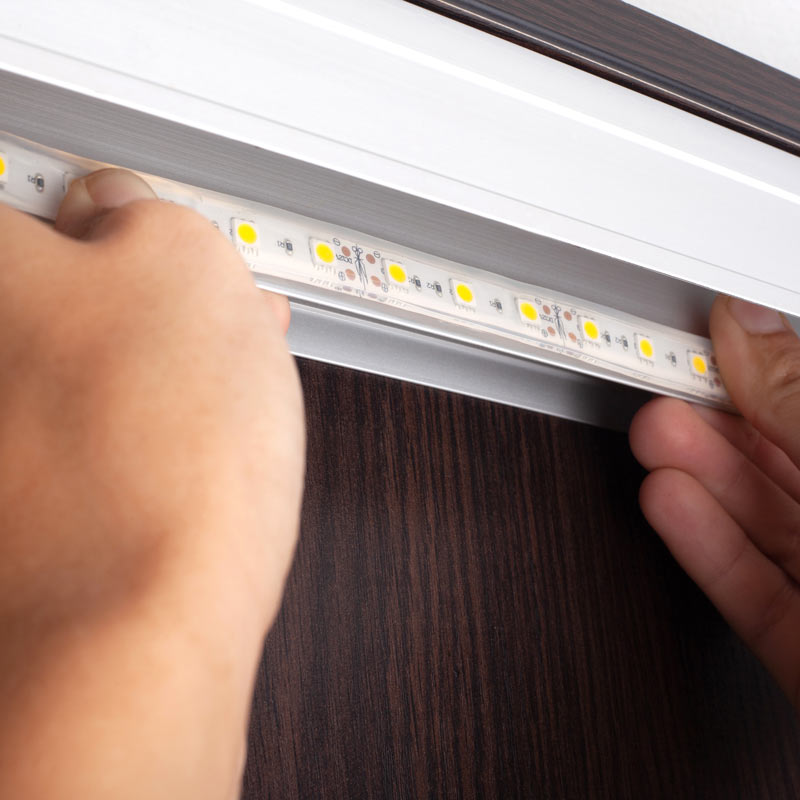
LED strip is easiest to install on an aluminium profile using clips, tape or glue (e.g. Kiiltofix Masa). If you use clips, you can assemble the following LED-the profile LED-with its tape on the worktop at your leisure and then fix it in place.
Cut off LED strip to the appropriate length using scissors at the copper cut-off points marked on the strip. Glue LED strip in place. You can also use, for example, wire clips with one end of the wire at the other. LED strip one end and the wires at the other.
LEDThe 'tape' usually comes with 10-100cm wires pre-installed at each end, which you can attach directly to the transformer's screw terminals. You can also extend the wires as you wish, for example with quick connectors.
We recommend for installations over 4m LED-to supply power to both ends of the strip, so that the lighting is uniform and one end does not dim due to voltage drop. You can run second supply wires to the long strip, either from the same transformer or by installing a strip in the middle of the transformer with wires to each end. The strip can also have two separate transformers at each end, and this often makes sense for example in >10m installations.
Connect strip the power supply to the + and - points, always plus to plus and minus to minus! Connect the power supply to the mains only after you are sure of the correct installation.
Transformers and wireless systems
For kitchen worktop lighting power supply should be concealed, for example on top of upper cabinets or inside a cupboard. power supply should always be positioned in such a way that it can be accessed in the future if necessary, e.g. through a inspection hatch, if power supply if it is permanently installed, for example inside a wall or ceiling.
The necessary accessories, such as a receiver for a wireless dimmer, are usually added to the transformer and LED-tape, i.e. on the secondary side. So if you are using a 12-24V wireless receiver, the order of products is as follows: The plug wire (usually the wires are attached with screw connectors to the 230V side of the transformer) - power supply - intermediate cable - receiver - LED strip