


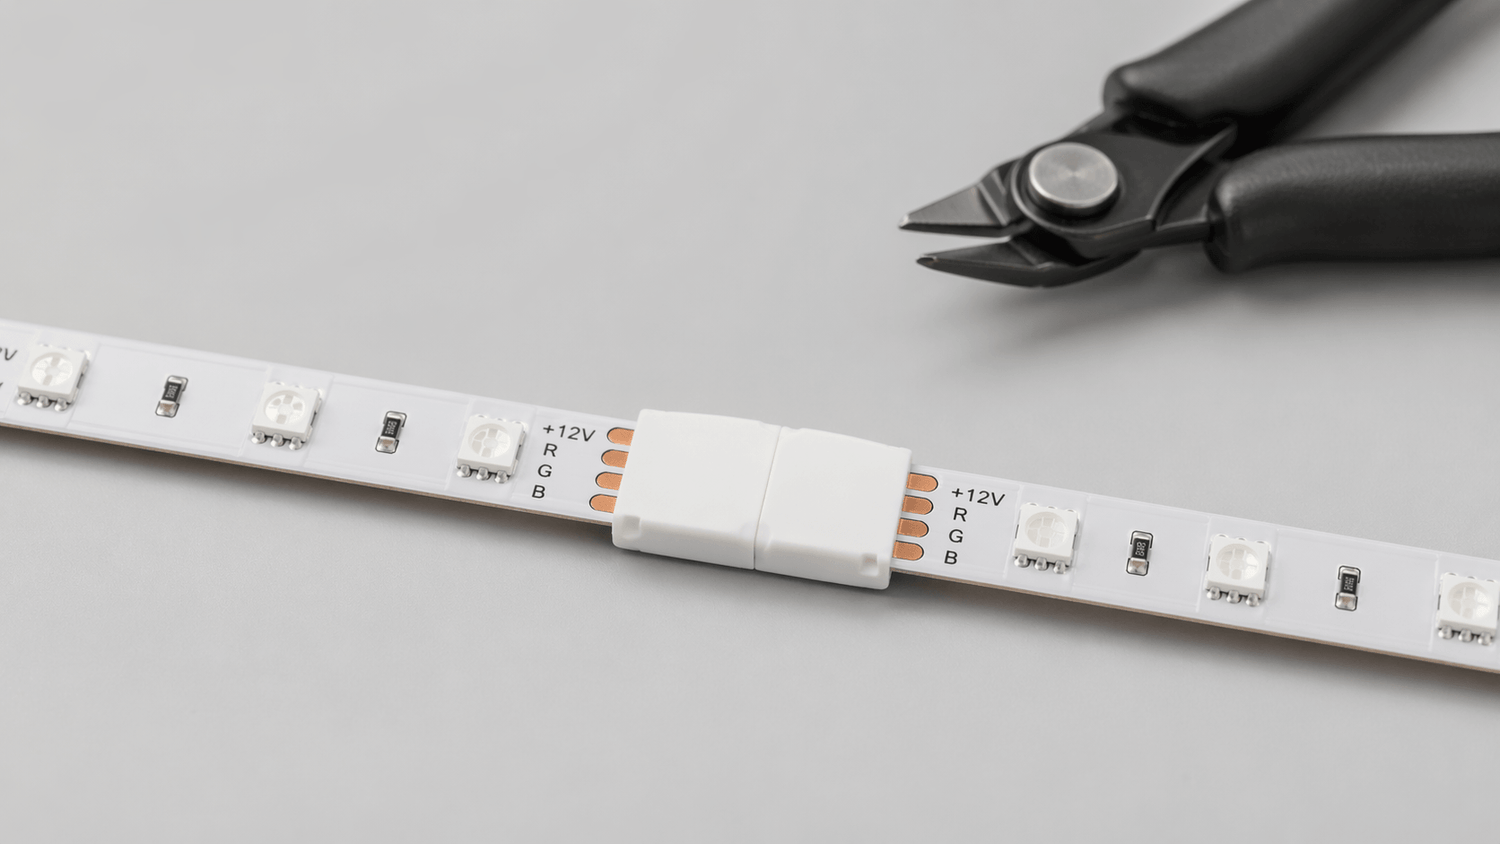
Cutting and extending LED strip lights is straightforward when you know the correct cutting points, suitable joining methods, and how to size your installation properly to avoid voltage drop and uneven brightness.
Many people wonder whether LED strips can be cut freely, when an extension piece is needed, and how best to connect two strip sections. In practice, a successful result depends on three key factors: cutting at the right point, choosing the appropriate joining method, and ensuring your power supply and voltage match the entire installation.
This article takes you through the process step by step: how to cut LED strip lights correctly, how to extend them neatly, and when to use connectors versus soldering. We'll also cover what you need to check before fixing your strip in its final position, including how to avoid common issues like voltage drop that can cause dimming at the far end of long runs—a frequent problem in larger European homes with extended kitchen worktop lighting or whole-room installations.
Where can you cut LED strip lights?
LED strip lights cannot be cut just anywhere along their length. Every strip has pre-determined cutting points, usually marked with a scissor symbol, a line, or a cutting mark positioned between the copper contact pads. When you cut at the correct point, the electrical circuit remains intact and the remaining section works normally.
Before you cut your LED strip, check at least these points:
• locate a clear cutting mark on the strip—these typically appear every 2.5cm, 5cm, or 10cm depending on the strip type and voltage
• ensure the strip is completely disconnected from power before handling
• use clean, sharp scissors or side cutters so the cut edge is straight and clean
• leave the copper contact pads intact if you plan to extend the strip later
If you cut the strip in the wrong place—between cutting points rather than at them—you'll end up with a non-functioning section or a very difficult joint to make. The cutting interval varies: 12V strips often allow cuts every 5cm (every 3 LEDs), whilst 24V strips may only permit cutting every 10cm (every 6 LEDs). This is particularly important when fitting strips into UK or European kitchen plinths, under-cabinet lighting, or inside aluminium profiles where precise measurements matter. Always measure your space carefully and plan where cuts will fall before you start, especially in architectural lighting projects where every centimetre counts.
How do you extend LED strip lights in practice?
Extending LED strip lights means electrically connecting two separate strip sections together. This can be done in several ways depending on whether you want a quick solution, an invisible join, or the most durable connection possible.
The most common extension methods are:
• direct connector between two strip sections—ideal for straightforward joins
• extension with cable when you need a gap between sections, such as bridging across a doorframe or around an obstacle
• corner connector when the strip needs to turn neatly around a 90-degree corner without visible wiring
• soldering when you want the most reliable and mechanically secure connection, particularly for permanent installations
The quickest method is usually a clip-on connector, but it's not always the best choice for every strip type. In tight spaces, inside aluminium profiles, or in long-term installations—such as permanent garden lighting on a European terrace or architectural lighting in a renovated period property—a soldered joint often proves more reliable over time. Connectors can sometimes work loose due to thermal expansion and contraction, especially in outdoor installations exposed to seasonal temperature changes common across European climates. In unheated garden rooms or summer houses, where winter temperatures can drop well below freezing, soldered connections provide much better long-term reliability than plastic connectors which can become brittle in cold conditions.

Connector or soldering – which should you choose?
Connectors are easy and quick to use, making them ideal for many basic installations. They're an excellent choice particularly when you want to complete the installation without soldering equipment or specialist skills. Soldering requires more precision and a steady hand, but the result can be electrically and mechanically superior, with a much slimmer profile that fits more easily into tight spaces.
A connector is often the right choice when:
• you want to complete the installation quickly without specialist tools
• it's a short extension or straightforward connection
• you're using an LED strip model specifically designed to work well with clip connectors
• the installation point remains easily accessible for future maintenance or adjustments
• you're doing a temporary installation or want the flexibility to reconfigure later—useful for rented accommodation across Europe where permanent modifications aren't permitted
Soldering is often the better option when:
• you want the lowest possible profile and most discreet joint
• the connection will sit inside an aluminium profile, behind furniture, or within another structure where bulky connectors won't fit
• the installation requires excellent mechanical durability—important in commercial settings or high-traffic areas
• it's a demanding or long-term permanent installation where you won't want to revisit the work
• you're working with high-density LED strips or RGB/RGBW strips where connector contact quality significantly affects performance
The most important consideration is that your joining method suits the specific strip, space, and intended use. For example, kitchen plinth lighting in a European home renovation project benefits from soldered connections hidden within the limited 15cm height of a standard plinth, whilst a simple under-shelf display light might work perfectly well with quick connectors. In bathrooms with IP65-rated strips, soldered joints with proper heat-shrink protection provide better moisture resistance than connectors around shower areas. Consider also that rising European energy costs make long-term reliability more valuable—a failed connector joint that causes inefficient operation or requires replacement wastes both energy and money over time.
What must you consider when extending LED strips to longer lengths?
Simply making a connection isn't enough. When you extend LED strip lights, the total length increases and the electrical requirements change accordingly. If you add too much length without proper planning, the result can be voltage drop, brightness differences, or uneven light output—commonly visible as dimming towards the far end of the strip.
Before extending, you should check:
• how much power the LED strip consumes per metre (typically marked in watts per metre, such as 9.6W/m or 14.4W/m)
• how long you intend the complete installation to be
• whether the power supply has sufficient capacity for the entire installation, including a safety margin of around 20%
• whether it makes more sense to use 12V or 24V strip for your particular run length
• whether you need multiple power injection points for runs exceeding the recommended maximum length—typically 5 metres for 12V strips or 10 metres for 24V strips
Voltage drop is a particular concern in longer installations common in European homes with expansive open-plan kitchen-diners or long hallways. A 12V strip running beyond 5 metres from a single connection point will often show visible dimming at the far end, whilst a 24V strip maintains consistent brightness over longer distances—sometimes up to 10 metres from one connection point. For very long runs, such as lighting the full perimeter of a large European terrace or garden pathway (common in Mediterranean or Central European properties with generous outdoor spaces), you may need to inject power at multiple points along the length or use a higher voltage strip to maintain even brightness. This becomes especially important when electricity costs are high across Europe—an inefficiently powered strip running at reduced brightness due to voltage drop wastes energy whilst delivering poor light output.
In practice, if you're installing 8 metres of LED strip consuming 10W per metre, you need a power supply capable of delivering at least 80W, plus a 20% safety margin, meaning approximately 96W capacity. Many installers round up to the next standard size—in this case, a 100W LED driver. Using an undersized power supply causes not only voltage drop but can also shorten the lifespan of both the strip and the power supply itself, which runs constantly at maximum capacity with no thermal headroom. European electrical standards (CE marked products) typically include these safety margins in their specifications, but it's worth double-checking when mixing components from different suppliers.
How to ensure your installation succeeds before final fixing
Once your strip is cut and connected, test the complete installation before final fixing. This saves considerable time and avoids unnecessary dismantling if a connection doesn't work as expected—particularly frustrating when you've already applied strips inside narrow aluminium profiles or behind fixed cabinetry.
Before final installation, complete at least these checks:
• test that all strip sections light up evenly across their entire length
• verify correct polarity at every connection—reversed polarity means the strip won't light at all
• check there are no noticeable brightness differences between sections, which indicate voltage drop or poor connections
• for RGB or RGBW strips, test all colour channels to ensure each connector carries all signals correctly
• leave the installation running for 15-30 minutes to check for any heat buildup at connection points, which suggests poor contact or excessive resistance
• verify that any controllers, dimmers, or smart home integration (increasingly common in European homes with systems like Philips Hue, IKEA Trådfri, or proprietary smart home platforms) work correctly across all connected sections
For outdoor installations on European terraces, balconies, or in gardens—increasingly popular as outdoor living spaces become year-round features even in Northern European climates—also verify the IP rating is appropriate. IP65 provides splash protection suitable for covered terraces, whilst IP67 or IP68 is necessary for ground-level garden lighting or anywhere the strip may be submerged during heavy rain, common during Atlantic weather systems affecting Western Europe. Check that any outdoor connections are properly sealed with heat-shrink tubing or IP-rated junction boxes—moisture ingress is the leading cause of premature failure in outdoor LED installations.
Finally, consider the adhesive backing on LED strips. The standard 3M tape works well on clean, dry surfaces but can fail on textured, cold, or slightly dusty surfaces common in older European buildings or outdoor installations. For challenging surfaces or permanent installations, consider using additional mechanical fixing with aluminium profiles and mounting clips, or supplementary adhesive specifically designed for outdoor use. In period properties with lime plaster or irregular surfaces, profiles provide both secure mounting and protection for the strip, whilst also improving heat dissipation—important for high-power strips that can reach 50-60°C during operation, potentially shortening LED lifespan if heat cannot escape.
Common mistakes to avoid when cutting and extending LED strips
Even with careful planning, certain mistakes appear repeatedly in LED strip installations across European homes and commercial spaces. Being aware of these common pitfalls helps you avoid frustration and wasted materials.
Typical mistakes include:
• cutting between marked cutting points rather than at them, leaving unusable sections
• mixing 12V and 24V components in the same installation—they're not interchangeable and will either not work or immediately damage the strip
• using indoor-rated strips outdoors or in damp locations like bathrooms, leading to rapid failure
• undersizing the power supply, causing voltage drop, dimming, and reduced lifespan
• creating runs that exceed the maximum recommended length without power injection points
• applying strips to dirty, dusty, or cold surfaces where adhesive won't bond properly—particularly common in winter installations in unheated spaces
• forgetting to account for controller or dimmer power consumption when calculating total load
• using connectors designed for different strip widths—8mm connectors won't work properly with 10mm strips, causing intermittent contact
Taking time to avoid these common errors makes the difference between a professional-looking installation that works reliably for years and a frustrating project requiring repeated fixes. In the context of European energy efficiency goals and increasingly expensive electricity, a properly installed LED strip system pays for itself through reliable, efficient operation whilst poor installation wastes both materials and energy.


0 comments