


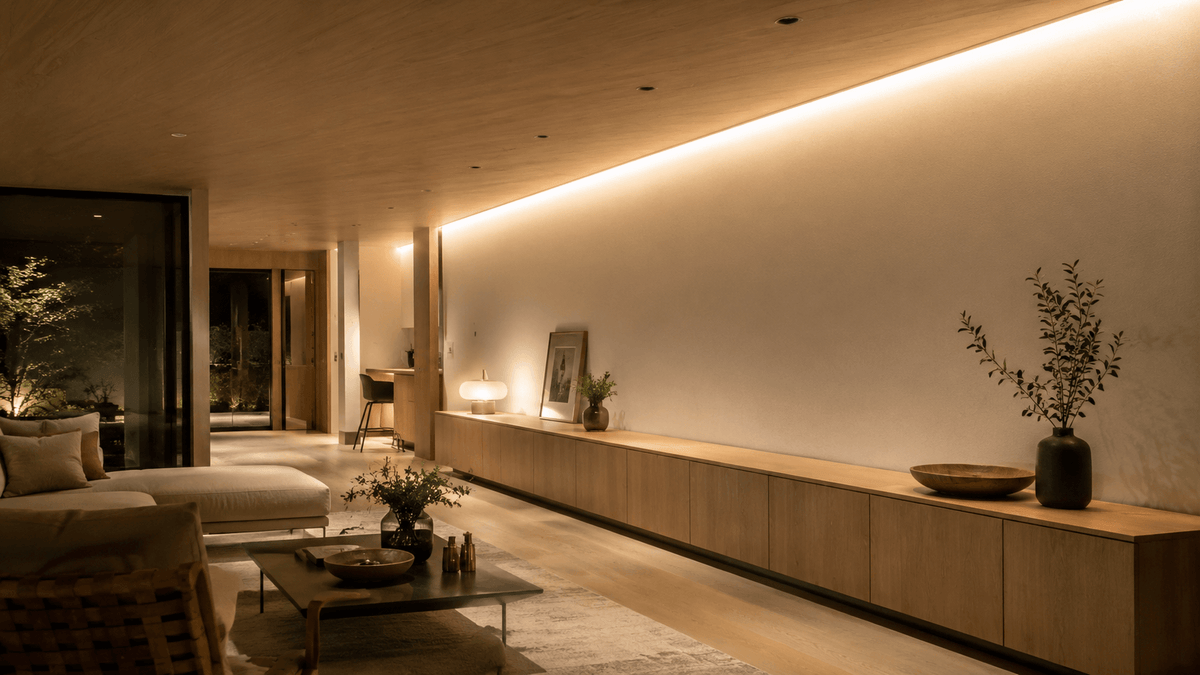
Long LED Strip Installation: Voltage, Power & Feed Points
Installing a long LED strip requires significantly more planning than a simple under-cabinet or shelf lighting project. When you're working with LED strip runs of several metres or more, the most critical factors are selecting the correct voltage, ensuring adequate power supply capacity, strategic placement of feed points, and managing voltage drop effectively. Overlook these elements, and you'll likely encounter dimming at the far end of the strip, colour shifting, or an overloaded power supply that may fail prematurely.
As a general rule, for longer installations spanning multiple metres, a 24V LED strip system is typically the better choice compared to a 12V system. The higher voltage means lower current draw for the same power output, which significantly reduces voltage drop over distance. However, the final choice depends on several factors: the power consumption per metre of your chosen LED strip, the total run length, the quality and gauge of your wiring, the power supply specifications, and critically, whether you'll be feeding power from one point or multiple points along the strip.
This comprehensive guide walks you through how to properly size and plan a long LED strip installation, explains why voltage drop occurs and how to minimise it, and shows you how to select the right components from the Valotehdas range, including 24V LED strips, power supplies, and LED controllers to ensure your project works flawlessly from day one.
Why Voltage and Feed Point Selection Matter for Long LED Strip Runs
LED strip lighting operates on the principle that the entire strip length receives consistent voltage. In short installations—say, a metre or two under kitchen cabinets—this is straightforward and rarely problematic. However, in long LED strip installations, the electrical resistance of cables, the copper traces within the strip itself, solder joints, and connectors all contribute to voltage loss. As electrical current travels along these conductors, the voltage gradually decreases, meaning the far end of your strip receives less voltage than the beginning. This manifests as noticeably dimmer LEDs at the end of the run, and in RGB or tuneable white (CCT) strips, colour accuracy suffers considerably.
Before you begin planning your long LED strip installation, consider these three fundamental questions:
- What is the total length of LED strip required for your project?
- What is the power consumption per metre (measured in watts per metre or W/m) of your chosen LED strip?
- From which point or points will you feed power to the strip?
For example, if you're installing LED strip lighting around the perimeter of a large living room or along a lengthy kitchen counter, a single feed point at one end is almost certainly inadequate. In such cases, you'll need to implement dual-end feeding (powering from both ends), centre feeding (powering from the middle with the strip running in both directions), or divide the installation into multiple independent sections, each with its own feed point. This is particularly important in European homes where open-plan living and kitchen spaces often feature continuous runs of 10 metres or more.
When calculating your requirements, always work backwards from your total strip length and power consumption. For instance, a 12-metre run of 10W/m LED strip totals 120W, requiring a power supply with at least 150W capacity (allowing a 20-25% headroom for longevity and stability). Attempting to power this from a single end would almost certainly result in significant dimming toward the far end, particularly with 12V strip.
Understanding Voltage Drop in LED Strip Installations
Voltage drop is the gradual reduction in electrical voltage as current travels through a conductor. In LED strip installations, this phenomenon becomes increasingly pronounced with longer runs, higher power consumption per metre, and thinner conductors—both in the strip's internal copper traces and in your supply cables. While some voltage drop is inevitable in any electrical installation, excessive drop causes visible performance problems.
The typical symptoms of problematic voltage drop include:
- The far end of the LED strip appears noticeably dimmer than the beginning, creating an uneven wash of light along walls or ceilings
- Colour temperature shifts along the strip length—warm white may appear cooler at the end, or vice versa
- In RGB or tuneable white (CCT) LED strips, colours appear inconsistent or washed out toward the far end, making it impossible to achieve uniform lighting effects
- The power supply runs excessively hot, operates near its maximum capacity, or triggers over-current protection, leading to flickering or complete failure
- Dimming functions behave erratically, with the far end of the strip responding differently to dimming commands than the beginning
You can minimise voltage drop through several strategies: selecting 24V LED strip for runs longer than 3-4 metres (as the lower current draw for equivalent power significantly reduces voltage loss), using appropriately sized cables—typically 1.5mm² or larger for longer runs, keeping cable runs as short and direct as possible, and most importantly, adding multiple feed points along the strip length. Modern European installations often benefit from professional-grade power supplies like the 320W 24V LED power supply which provides stable output even under demanding conditions.
For complex installations, it's worth thinking of your LED strip not as a single continuous element, but as several electrically distinct zones that happen to create a visually continuous effect. This approach—feeding power at strategic intervals rather than from a single point—is how professional lighting installers achieve uniform brightness in commercial and high-end residential projects.
12V vs 24V LED Strip: Which Voltage for Long Runs?
The choice between 12V and 24V LED strip is one of the most fundamental decisions in any installation, and it becomes critically important for longer runs. While 12V LED strip remains popular for short applications—accent lighting in display cabinets, under narrow shelves, or in small furniture pieces—24V strip offers decisive advantages once you exceed 3-4 metres of continuous run.
The physics is straightforward: for the same power output, a 24V system draws half the current of a 12V system (since Power = Voltage × Current). Lower current means proportionally less voltage drop across the same resistance. For instance, a 10W/m LED strip at 12V draws approximately 0.83A per metre, whilst the same 10W/m strip at 24V draws only 0.42A per metre. Over a 6-metre run, this difference compounds significantly, with the 12V installation experiencing roughly twice the voltage drop of the 24V equivalent.
| Comparison | 12V LED Strip | 24V LED Strip |
|---|---|---|
| Typical Applications | Short runs, compact furniture lighting, display cases, and limited installations under 3 metres | Longer continuous runs, kitchen counter lighting, indirect cove lighting, architectural installations, and projects exceeding 4-5 metres |
| Voltage Drop Management | Requires careful attention and multiple feed points for runs beyond 3-4 metres | Significantly easier to manage in long installations; single feed points can often serve 5-7 metres depending on power density |
| Power Supply | 12V DC power supply required | 24V DC power supply required, such as the 300W 24V dimmable LED driver |
| Current Draw (for same power) | Higher current, thicker cables needed for equivalent performance | Lower current, more efficient power transmission over distance |
| Safety Considerations | Both operate at extra-low voltage (ELV) and are equally safe for DIY installation | Both operate at extra-low voltage (ELV) and are equally safe for DIY installation |
| Recommendation | Excellent for short, localised lighting tasks | Strongly recommended when total LED strip length exceeds 4-5 metres or for any architectural lighting project |
In typical European home installations—such as lighting a 4-metre kitchen countertop, creating a 6-metre cove lighting effect around a living room ceiling, or illuminating a 10-metre hallway—24V LED strip is almost always the superior choice. It simplifies installation, improves reliability, and delivers consistent light output across the entire run. That said, even 24V strip has its limits: a particularly long or high-power installation may still require multiple feed points or division into separate zones to maintain optimal performance.
Feed Point Strategies and Power Supply Sizing
The feed point is where electrical power enters your LED strip. In simple, short installations, feeding from one end is perfectly adequate. However, as installation length and complexity increase, your feed point strategy becomes crucial to achieving uniform brightness and colour consistency. European homes, with their often-lengthy corridors, expansive open-plan spaces, and architectural features like cove lighting around high ceilings, frequently demand more sophisticated approaches.
| Feed Point Strategy | When to Use | Key Considerations |
|---|---|---|
| Single-End Feed | Short runs up to 3-4m (12V) or 5-6m (24V) with moderate power density | Simplest to implement with minimal wiring, but the far end will dim on longer or higher-power runs; always verify against manufacturer specifications |
| Dual-End Feed | Continuous runs of 6-10 metres where splitting into separate sections isn't practical | Effectively halves the maximum distance current must travel, dramatically reducing voltage drop; requires careful cable routing to feed power from both ends |
| Centre Feed | When LED strip extends in both directions from a central power supply location, such as along a ceiling centre line | Ideal for symmetrical installations; the strip effectively becomes two shorter runs, each benefiting from minimal voltage drop; common in indirect cove lighting applications |
| Multiple Independent Feeds | Very long installations (10+ metres), high-power strips (15W/m or higher), or complex layouts spanning multiple rooms | Requires more complex planning and potentially multiple power supplies; offers maximum control and uniformity; essential for professional-quality results in demanding applications |
Choosing the right power supply capacity is equally critical. Always calculate based on your total LED strip power consumption, then add a safety margin of 20-25%. This headroom ensures the power supply doesn't operate continuously at maximum capacity, which would reduce its lifespan and potentially cause thermal issues or instability.
Practical Sizing Example
| Calculation Step | Example Value | Notes |
|---|---|---|
| Total LED Strip Length | 8 metres | For example, indirect cove lighting around a medium-sized living room |
| Power per Metre | 10 W/m | Check your specific LED strip product specifications; higher-quality strips often consume 12-15W/m for better brightness |
| Total Power Consumption | 8m × 10W/m = 80W | This is your baseline power requirement |
| Recommended Power Supply | 80W × 1.25 = 100W minimum | A 100-120W power supply provides adequate headroom; for this application, the 75W 24V dimmable driver would be undersized—opt for a 100W or larger unit instead |
| Feed Point Strategy | Dual-end feed or centre feed recommended | Single-end feed would likely cause visible dimming over 8 metres; feeding from both ends or the centre ensures uniform brightness |
In real-world European installations, you might encounter scenarios like these: A 12-metre kitchen counter installation using 12W/m LED strip (total 144W) would ideally be split into two 6-metre sections, each powered by a separate 100W supply, or powered from both ends using a single 200W supply with appropriate cable gauge. A 15-metre corridor using 10W/m strip (total 150W) might use three 5-metre sections with individual feeds, or a dual-end feed approach with a robust 200W power supply and heavy-gauge cables.
Cable Sizing and Installation Best Practices
Even with the correct voltage and adequate power supply capacity, inadequate cabling can undermine your entire installation. The cables connecting your power supply to the LED strip feed points must be sized appropriately to carry the current without excessive voltage drop. For most residential long LED strip installations in Europe, 1.5mm² cable is the practical minimum for runs up to 5 metres, whilst 2.5mm² cable should be used for longer cable runs or higher currents.
Consider this practical example: You're installing 6 metres of 12W/m, 24V LED strip in a kitchen, fed from one end. The total current is 3A (72W ÷ 24V). If your power supply is located 4 metres away from the strip start point, using inadequate 0.5mm² cable could introduce significant voltage drop even before power reaches the strip itself. Using 1.5mm² cable minimises this issue, ensuring the strip receives close to the full 24V.
Additional installation best practices include: Always use proper LED strip connectors or solder joints—poor connections introduce resistance and potential failure points; secure the strip properly to its mounting surface to ensure good heat dissipation (LED strips rely on the mounting surface as a heat sink); avoid sharp bends or kinks in the strip, which can damage internal conductors; and plan cable routes to minimise length whilst maintaining a neat, professional appearance.
Dimming and Control Considerations for Long LED Strip Installations
If you're planning to dim or control your long LED strip installation—and most modern European smart homes incorporate this functionality—you'll need to account for compatibility between your power supply, controller, and the LED strip itself. The most common dimming methods for LED strips are TRIAC/phase-cut dimming (controlled by traditional wall dimmers), 0-10V dimming, PWM (pulse-width modulation) dimming, and smart control via protocols like Zigbee, Wi-Fi, or Matter.
For long installations, centralised control often makes most sense. Rather than attempting to dim the LED strip directly with a wall dimmer (which can be problematic with multiple power supplies), consider using a dedicated LED controller between your power supply and the strips. Modern smart controllers like the MiBoxer SM2 Matter LED controller support both single-colour and tuneable white LED strips, integrate seamlessly with popular European smart home ecosystems, and can manage the complexities of multi-zone installations with ease.
For installations using multiple power supplies across different zones, ensure all zones dim synchronously to avoid visible differences. This typically requires either multiple controllers receiving the same control signal, or a single powerful controller capable of managing the entire installation.
Troubleshooting Common Issues in Long LED Strip Installations
Even with careful planning, issues can arise. Here's how to diagnose and resolve the most common problems:
Dimming at the far end: This is almost always voltage drop. Solutions include switching to 24V strip if using 12V, adding feed points (dual-end or centre feeding), using heavier gauge cables, or reducing the total strip length per power supply.
Colour inconsistency in RGB or tuneable white strips: Voltage drop affects different colour channels unequally. Red LEDs typically have lower forward voltage than blue or white, so they remain brighter even as voltage drops, shifting the colour balance. The same solutions as above apply, but colour accuracy is even more sensitive to voltage drop than simple brightness.
Flickering or intermittent operation: Check all connections—poor solder joints or loose connectors are common culprits. Verify your power supply isn't overloaded or operating in thermal shutdown. Ensure your dimmer or controller is compatible with your specific LED strip and power supply combination.
Power supply running very hot or shutting down: The power supply is likely undersized for your installation. Calculate your total power consumption again, verify you've allowed adequate headroom (20-25%), and consider upgrading to a higher-capacity unit or splitting the installation across multiple supplies.
Planning Your Long LED Strip Project: A Step-by-Step Summary
To ensure your long LED strip installation succeeds, follow this systematic approach:
- Measure your total required LED strip length accurately, accounting for corners, returns, and any architectural features
- Select an appropriate LED strip—24V for runs over 4-5 metres, with power density (W/m) suited to your brightness requirements
- Calculate total power consumption (length × power per metre) and select a power supply with 20-25% capacity headroom
- Plan your feed point strategy—single-end for short runs, dual-end or centre feed for medium runs (6-10m), multiple feeds for very long or complex installations
- Size your cables appropriately—minimum 1.5mm² for most installations, 2.5mm² for longer cable runs or higher currents
- If dimming or smart control is required, select compatible components and plan the control architecture early
- Before final installation, test a sample section to verify brightness, colour, and dimming performance
- Document your installation—note power supply locations, feed points, and cable routes for future maintenance or modifications
By following these principles and selecting quality components from the Valotehdas range, your long LED strip installation will deliver uniform, reliable, and beautiful lighting for years to come, whether you're illuminating a modern Scandinavian kitchen, creating atmospheric cove lighting in a contemporary living space, or adding architectural accent lighting throughout your European home.


0 comments