


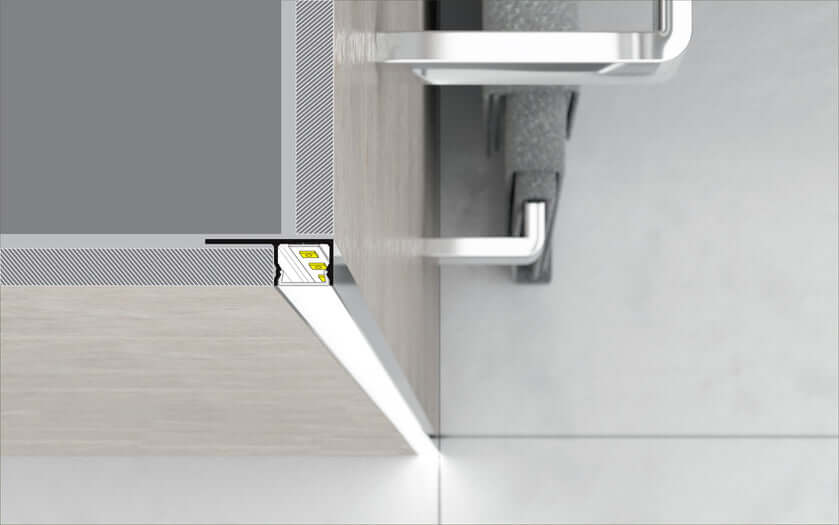
Lighting is one of the most important elements of home decor, but its technical implementation often receives too little attention. When aiming to create a long-lasting and visually pleasing lighting solution.
Next, we will delve into why using profiles is essential and how to choose the right components for your project.
Why use an aluminum profile with LED strips?
An LED strip is a thin and flexible component, but it is also delicate. Using an aluminum profile, or LED channel, brings three key benefits: aesthetics, protection, and thermal management. When discussing a quality installation, using a profile is almost invariably recommended.
Firstly, aesthetics is the main reason for many consumers. A bare LED strip, where the LED chips are visible as dotted light sources, can be dazzling and look unfinished. A cover, or diffuser, installed in the profile diffuses the light evenly, resulting in a uniform and stylish line of light. This is particularly important on reflective surfaces, such as kitchen countertops or glossy floors, where the reflection of LED dots is undesirable.
Secondly, protection is critical, especially in the kitchen and sauna. The aluminum profile protects the LED strip from splashes, steam, and physical impacts. For example, an LED strip under a kitchen cabinet is subjected to heavy use during cleaning and cooking. The profile makes the installation sturdy and easy to clean.
The third and perhaps most important technical reason is thermal management. Although LEDs are energy-efficient, they still generate heat. Especially powerful strips (such as 15W/m or 18W/m) require an aluminum surface to act as a heatsink. Without adequate cooling, LED chips overheat, leading to a rapid decrease in light output and, in the worst case, premature failure of the strip.
Different types of aluminum profiles and their uses
The market offers a wide range of different aluminum profiles designed to meet the requirements of various installation methods. The choice depends on whether the luminaire is intended to be recessed, surface-mounted, or perhaps to produce indirect light.
- Surface-mounted profiles: These are the most common and easiest to install. Models such as PINTA10.v2 or PINTA14.v2 are excellent for kitchen backsplashes or under shelves. They are screwed or glued directly to the surface.
- Recessed profiles: If you want the LED strip to be flush with the surface, choose a recessed profile such as SUORA12. This requires routing a groove into the mounting surface, but the result is extremely discreet and integrated.
- Corner profiles: Designed for installation in corners, such as the junction of a wall and ceiling or a cabinet and wall. They reflect light at an optimal 45-degree angle onto the illuminated object.
- Special profiles: Our selection also includes narrow models such as VIIVA8 or MINI10, suitable for tight spaces, and SEINÄ12, specifically designed for creating indirect lighting through wall surfaces.
Quality options, such as Topmet aluminum profiles, offer a wide range of accessories, including end caps and mounting clips, which make the installation neat and professional.

Example: SUORA12 and SQUARE16 profiles
These models are popular due to their versatility. SUORA12 is an excellent choice for basic installations requiring a 12mm internal width for the strip. SQUARE16, on the other hand, offers a bit more space and depth, which further helps in diffusing the light.
Choosing a diffuser: Opal, semi-frosted, or clear cover?
The diffuser is a plastic cover that snaps onto the profile and significantly impacts the quality and appearance of the light. The choice of diffuser should be made according to how visible the LED strip is.
Opal (milky white) cover: This is the most popular choice. The opal cover effectively diffuses light, almost completely eliminates LED dots (especially with COB strips), and softens shadows. Note, however, that an opal cover reduces light output by about 20–30%.
Semi-frosted cover: An intermediate option between clear and opal. It diffuses light somewhat but transmits more light than an opal cover. The dots may be slightly more visible, but the light output remains better.
Clear cover: Used when the LED strip is hidden (for example, in indirect lighting behind a plasterboard edge) and maximum light output is desired. A clear cover protects the strip from dust but does not diffuse light at all.
When the goal is to achieve a perfectly uniform line of light, we recommend combining an opal diffuser with a dense LED strip, such as a COB strip with 480 or 544 LEDs per meter. In this case, the LED strip will look like a continuous light tube.
Step-by-step installation of an aluminum profile
Successful installation requires careful planning and the right tools. Follow these steps to achieve a professional result:
- Measure and cut: Measure the installation location accurately. Aluminum profiles can be cut to size with a hacksaw or miter saw (with an aluminum blade). Remember to cut the diffuser at the same time for a perfect fit.
- Prepare wiring: Drill a hole in the profile for the wire or ensure the end cap has a pass-through. It is easier to route the wire through the profile before attaching it to the surface.
- Attach the profile: Secure the profile with screws, mounting clips, or strong adhesive tape. For kitchen backsplashes, clips are often the neatest solution.
- Install the LED strip: Clean the inside surface of the profile thoroughly from dust and grease (e.g., with isopropanol). Remove the protective film from the 3M tape on the back of the strip and press the strip evenly onto the bottom of the profile. Be careful not to press directly on the LED chips.
- Install the diffuser and end caps: Snap the cover into place and finish the installation with end caps. End caps provide a refined look and prevent light from escaping the ends of the profile.
Always remember to check the strip's functionality before permanently closing the cover. If it's a dimmable system or smart control (Zigbee, Casambi), test the control's functionality at this stage.
Thermal management and extending the lifespan of LED strips
One of the most frequently asked questions is: "Is a profile really mandatory?" The answer almost always relates to heat. As LED technology advances, the power of LED strips has increased. For example, a 24V COB strip with 15W/m power generates a significant amount of heat in a small area.
Aluminum is an excellent conductor of heat. When an LED strip is glued directly to an aluminum profile, heat transfers from the strip's circuit board to the aluminum and then to the surrounding air. This keeps the LED chip's operating temperature optimal. If the same LED strip were installed directly on wood or plastic (which act as insulators), the heat would remain in the strip, leading to color deviations and the strip burning out prematurely, even within months.
Tips for stylish and discreet lighting

In lighting design, "less is often more." The goal is usually to see the effect of the light, not the light source itself. Here are some tips on how to best utilize LED strip solutions:
- Indirect light: Install the profile at the ceiling line behind a plasterboard edge or trim so that light reflects off the ceiling into the room. This creates a soft and luxurious atmosphere without glare.
- Plinth lighting: An LED strip installed in the plinth of kitchen or bathroom cabinets serves as excellent night lighting and adds a sense of space.
- Staircase: Embed the profile under a stair tread or in the handrail. This enhances safety and is a visually striking detail.
- Color Rendering Index (CRI): Pay attention to the LED strip's CRI value. Our strips offer CRI>90, meaning colors appear natural and vibrant under the light.
- Dimming: Don't forget control. A quality 24V transformer and a wireless dimmer (such as Zigbee or Matter compatible solutions) allow lighting to be adjusted according to the mood.
Finally, remember to choose the right color temperature. For kitchens and workspaces, a neutral 4000K is often suitable, while for living areas and saunas, a warm 2700K or 3000K creates a cozier atmosphere. If you want flexibility, a CCT adjustable strip allows you to adjust the color temperature according to the situation.
If you need help planning your project or choosing the right products, our experts are happy to assist. You can contact us via the contact page. Quality lighting is an investment in living comfort and the value of your home.


0 comments